A customer can enable auto-lock for a specific investor, product type, and business channel with the Encompass Select integration. This article describes the steps to enable this functionality.
- Log in to Optimal Blue as system user.
- Select the customer from the Hierarchy drop down list.
- Select the Corporate channel from the entity drop down list.
- Leave OB User selected for the user and click the Lender button.

- Navigate to the admin tab and ensure you have the appropriate business channel selected from the entity drop down list.

- Locate the entity preference option under Locking Options for Uses Instant Lock Confirmation and set to “No”.

- Scroll down to the Integration Options-System Only section to change the Entity Preference for Uses Instant Lock Confirmation Via Select from “No” to “Yes”.

- Launch the Configuration site by either clicking the Logout option to return to the website selection screen or clicking the Configuration site link found in the Secondary tab sub navigation menu.
- On the Entity Selection screen, select the appropriate investor you want to enable auto-lock for.
- Make note of the entity number for the appropriate business channel. To do this, hover over the entity name and the entity number will appear at the end of the javascript message at the bottom of your browser.

- Navigate to Manage Products either through the navigation tab or the investor activity.
- Select the appropriate Product/Product set.
- Click the Adjustments activity.
- Click Add New Grid Set and type in the new grid set name. The best practice is to name grid sets after entity. product/set, and whether adjustment or eligibility (ex. BB&T Conf Fixed Adj).

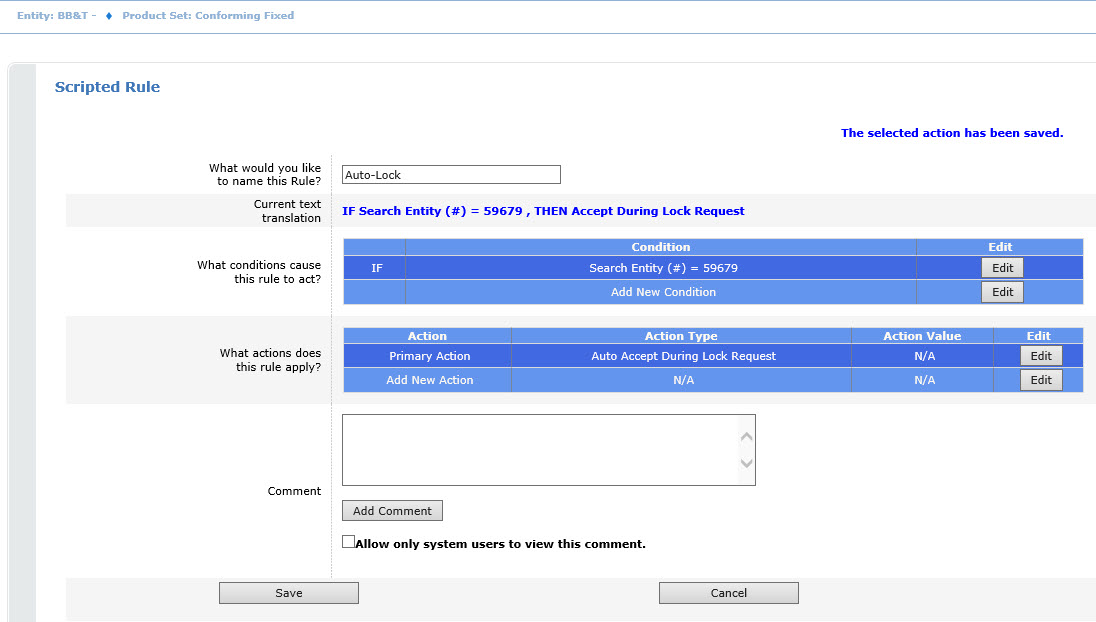
- Select Add Scripted Rule from grid set activity selection. Name the new rule Auto-Lock.
- Click the Edit button beside “Product Default” for the condition and select Search Entity(#) for the variable, select Equal To for the Operator and input the appropriate Business Channel entity ID for the value. Click Update.
- Click the Edit button beside Add New Action and select Auto Accept During Lock Request. Click Update.
- Click Save.

- Release Updates to Production for the rule to go into effect on the Lender Site.